We will use the Breakout layout from our previous chapter. Our goal is to move the objects in our game by modifying the output.py file made by the rlpp_processor.
The output.py script uses a special type of programming style (or paradigm) called Object Oriented Programming (OOP). If you've had the opportunity of working with other game engines like Unity, UnrealEngine or Godot, this approach may feel familiar to you. Take a look at the following class GameObject:
class GameObject():
    def __init__(self,position, angle, object_type, img_path,scale_factor, dx=0.1,dy=0.1):
        self.x, self.y = position
        self.dx = dx
        self.dy = dy
        self.placed = False #stops following cursor once it's placed
        self.object_type = object_type
        self.image_path = img_path
        self.image = pygame.image.load(img_path)
        self.rect = self.image.get_rect()
        self.rect.center = position
        self.angle = angle
        self.scale_factor =scale_factor
        self.turnClockwise()
        self.scale()

    def draw(self, display):
        ...

    def turnClockwise(self, degrees=0):
        ...

    def updateRect(self):
        ...

    ... etcetera
We say the class GameObject contains attributes (an image for the sprite, position in x, position in y, ...) and methods. Methods are Python functions that allow us to modify the attributes inside a class, and represent actions our game objects perform, like moving, sprinting, jumping, etc. If this is a bit confusing, think about yourself as a class; your name, last name, age and height are attributes, and the things you do with those attributes are methods. For example, take a look at this Python class:
class Person():
    def __init__(self,name,age,last_name):
        self.name = name
        self.age = age
        self.last_name = last_name

    def sign(self):
        ... self.name

erick = Person("Erick",23,"Erickson")
erick.sign()
Back to our game, all of the objects in our game are children of this parent class GameObject, but not all game objects are the same. We can expect walls to have different properties than agents, and agents different properties to food. Some elements require movement while others remain static, and some other can receive user input. To solve this problem, we creade child classes. One for each category in the rlpp_designer: agents, walls, enemies and foods. Think of child classes as getting a new phone and adding accessories to it. The phone still works (hopefully) the same, but has new stuff to improve its performance based on your needs. Here is an example of a child class:
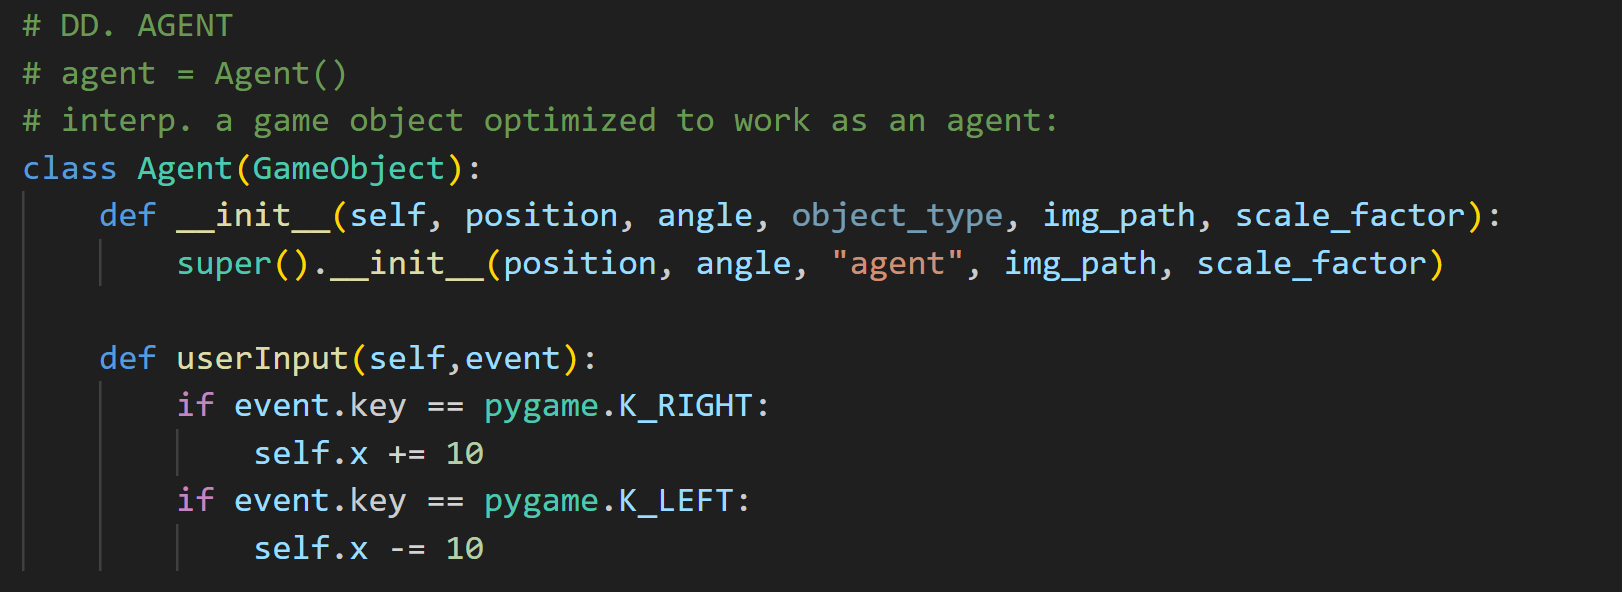
class Agent(GameObject):
    def __init__(self, position, angle, object_type, img_path, scale_factor):
        super().__init__(position, angle, "agent", img_path, scale_factor)

    def userInput(self,event):
        if event.key == pygame.K_RIGHT:
            self.x += 10
        if event.key == pygame.K_LEFT:
            self.x -= 10
The class Agent begins as a copy of the GameObject class, but we add to it a new function called userInput() that makes the object move based on the user pressing the left or right arrowkeys in their keyboard.
Building our paddle (Agent)
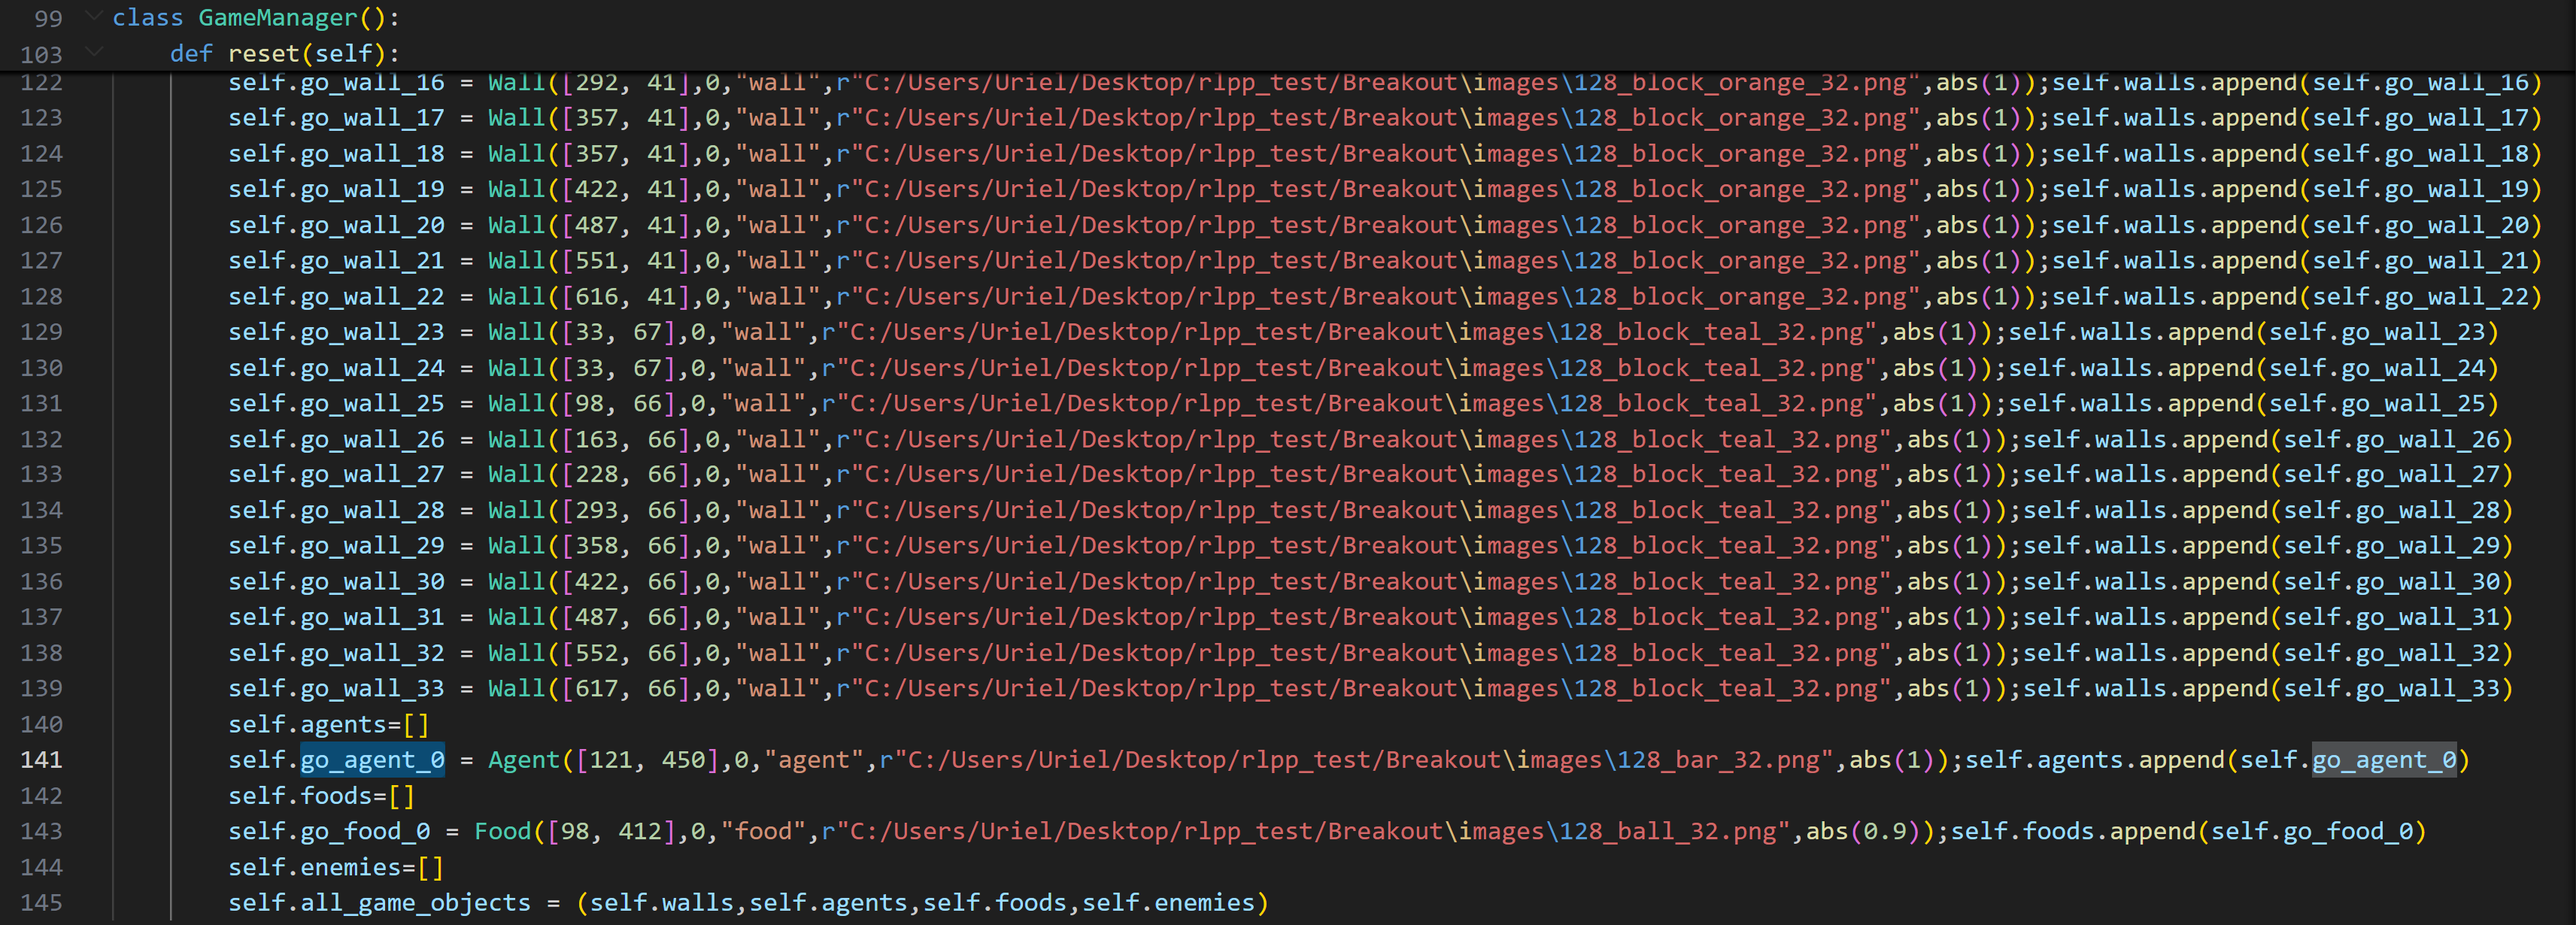
Let's identify the name of the paddle in the output.py file. Because it's an agent, and we only have one agent, its name is self.go_agent_0. We replace this name for self.paddle. You can see it in the screenshot below, in line 141. Change also self.go_food_0 for self.ball
At the bottom of your file there are two main functions draw() and update(). This is standard Pygame architecture. We will always use draw to handle pixels, and update for eveything else. Right before using draw() and update() we create a new variable gameManager that represents an instance of the GameManager class. We now have an actual object to represent our manager.
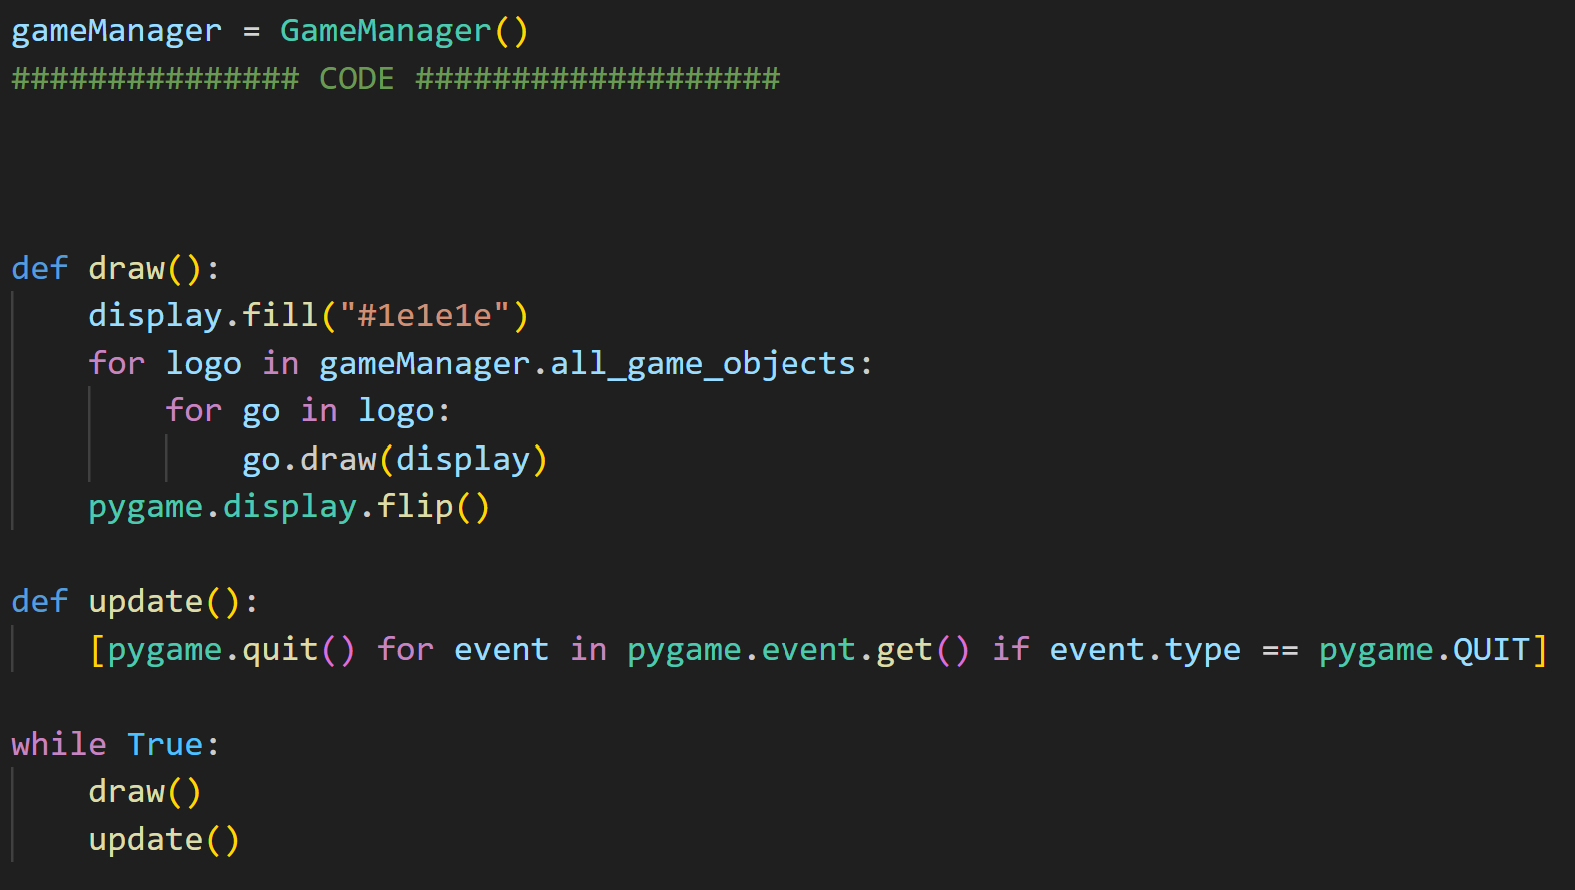
The function draw()
It's important to notice what is happening in the draw function. First, the Pygame surface (a special object that connects to the language C to create a window in the screen) contains, among other things, a function fill, which sets the color of all pixels to a specific color. Then, we visit every game object and draw it. The draw() function ends with the action flip(), which makes Python ask for a refresh so the changes to the pixels actually take place.
So, in some ways, Python and Pygame are like Prep Cooks (people who prepare the ingredients hours before the chefs make the food). They calculate everything, and when the time is ready, the programming language that actually has the power to create pixels comes in, applying the changes to the screen.
The function update()
The update is where the actions in our game take place, and is where the algorithm that represents
our game should become clear. Notice the strange syntax that is taking place:
This line of code is a special form of syntax used to represent a list, known as list
comprehension. That line is equivalent to the following:
[pygame.quit() for event in pygame.event.get() if event.type == pygame.QUIT]
for event in pygame.event.get():
    if event.type == pygame.QUIT:
        pygame.quit()
The rlpp_processor uses list comprehension because at the beginning the only use for the user input is to close the window. Let's change that. Replace the list comprehension list for the more traditional for loop structure. We will also edit the loop to catch more actions other than closing the window. We will add the user's key down functionality, and send the event to the paddle to handle that event:
        def update():
            for event in pygame.event.get():
                if event.type == pygame.QUIT:
                    pygame.quit()

                if event.type == pygame.KEYDOWN:
                    gameManager.paddle.userInput(event)
        def userInput(self,event):
            if event.key == pygame.K_RIGHT:
                self.x += 10
            if event.key == pygame.K_LEFT:
                self.x -= 10
Notice that the function receives a parameter called event. This event is a special type of object from Pygame that represents the information coming from the user. We can now access additional information from this event. Because we know this event happens when the user presses any key in their keyboard, we just need to filter for specific keys. We use the right arrow and the left arrow keys. Click HERE for a complete list of all the keys supported by Pygame. Our Agent class should look like this:
And now let's run the code! To our encouragement, the paddle moves. Perhaps to our dissapointment, it does so only once when the user presses the arrow key. To solve this issue, we will need another variable, called self.direction, to handle the event for us. The self.direction variable is a bit odd. It is represented as a list with three integer values:
                    self.direction = [0,1,0]
                        if:
                            self.direction = [1,0,0], it means the paddle is going left
                            self.direction = [0,1,0], it means the paddle is going nowhere (no movement)
                            self.direction = [0,0,1], it means the paddle is going right
Let's add self.direction to the Agent class:
        class Agent(GameObject):
            def __init__(self, position, angle, object_type, img_path, scale_factor):
                super().__init__(position, angle, "agent", img_path, scale_factor)
                self.direction = [0,1,0]

            def userInput(self,event):
                if event.key == pygame.K_RIGHT:
                    self.direction = [0,0,1]
                elif event.key == pygame.K_LEFT:
                    self.direction = [1,0,0]
Then, we need to apply the movement of the paddle at every frame, by modifying a function from our agent's parent class called update_position. To modify it, we can redefine the function inside our Agent class:
            def update_position(self):
                if self.direction == [1,0,0] and (self.x - self.image.get_width()//2) > 0:
                    self.x -= PADDLE_SPEED
                elif self.direction == [0,1,0]:
                    return
                elif self.direction == [0,0,1] and (self.x + self.image.get_width()//2) < SCREEN[0]:
                    self.x += PADDLE_SPEED
This line makes sure the paddle doesn't leave the screen beyond the left edge (position 0 in x):
(self.x - self.image.get_width()//2) > 0(self.x + self.image.get_width()//2) < SCREEN[0]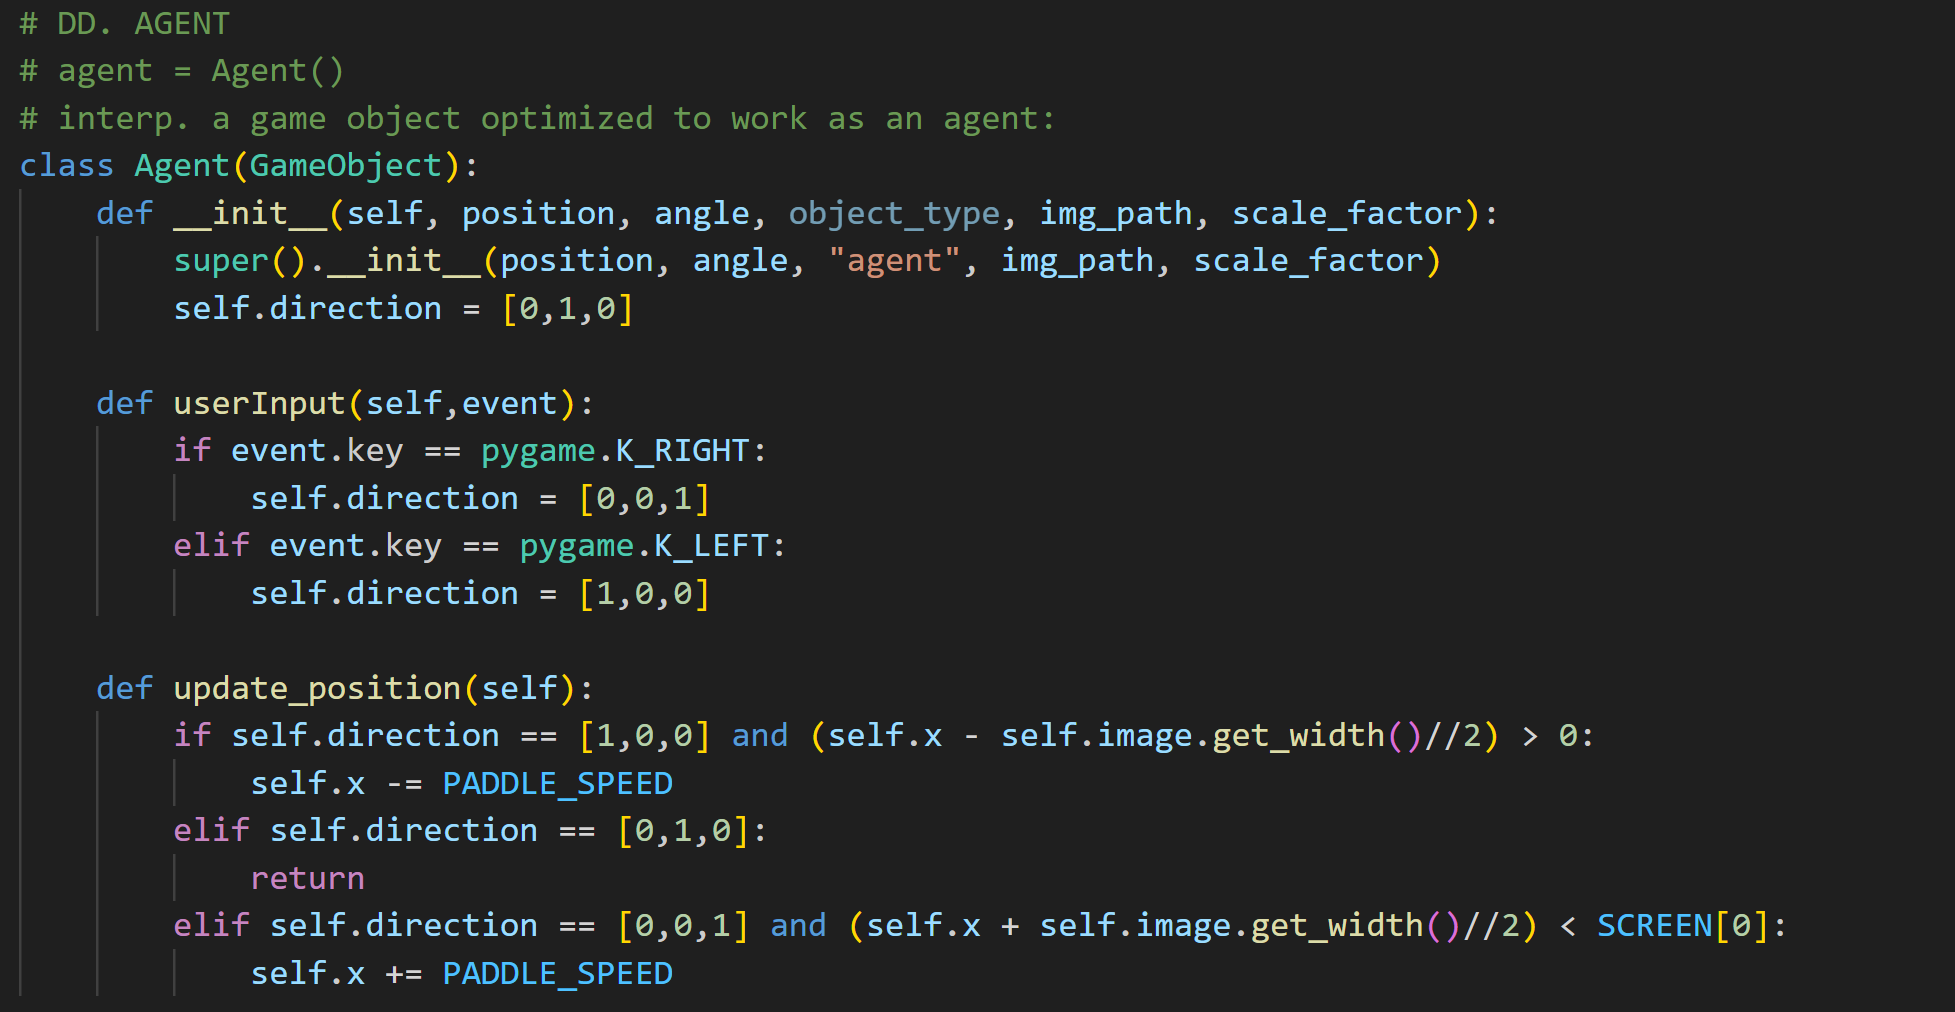
We're almost done. The values of += 10 and -= 10 have been replaced by a variable called PADDLE_SPEED that we defined at the top of the document, so we can change the paddle's speed value there and apply it to the rest of the code. Notice that the userInput() function no longer changes the position in x, but the value of the self.direction variable. To be able to stop the paddle once we change the value, we will use the KEYUP event in our main update() function:
            def update():
                for event in pygame.event.get():
                    if event.type == pygame.QUIT:
                        pygame.quit()
                    if event.type == pygame.KEYDOWN:
                        gameManager.paddle.userInput(event)
                    if event.type == pygame.KEYUP:
                        if event.key == pygame.K_RIGHT or event.key == pygame.K_LEFT:
                            gameManager.paddle.direction = [0,1,0]
                    gameManager.paddle.update()
Finish the paddle by calling the update function from the GameObject class, directly from the agent using gameManager.paddle.update(), and if the paddle is too fast, change the value 10 to something smaller. You can make a global variable that represents the speed, at the top of your program. Even if it's not part of the class Agent, it will still be visible, and the class Agent will be able to use it.